4. Advanced
Environment Setup
Before running any project in this chapter, you need to set up a Python virtual environment and install the required dependencies.
Open PowerShell or CMD, navigate to the downloaded code directory, then enter the
Advancedfolder.Run the setup script:
.\setup.batThis will automatically create a
venvvirtual environment and install all required pip packages inside it (your system Python environment will not be affected).After installation completes, activate the virtual environment:
PowerShell:
.\venv\Scripts\Activate.ps1CMD:
.\venv\Scripts\activate.bat
Once activated, you will see
(venv)at the beginning of the command line.Navigate to the corresponding project directory and run the script:
python <script_name>.py
Part 1: OpenCV
Note
All OpenCV projects require the UVC webcam firmware. Please flash the usb_webcam project from the ESP-IDF chapter to the development board first.
Note
Make sure the virtual environment is activated before running any project.
For each project below, open VS Code, navigate to the Advanced/1.openCV directory, right-click and select “Open in Integrated Terminal”.
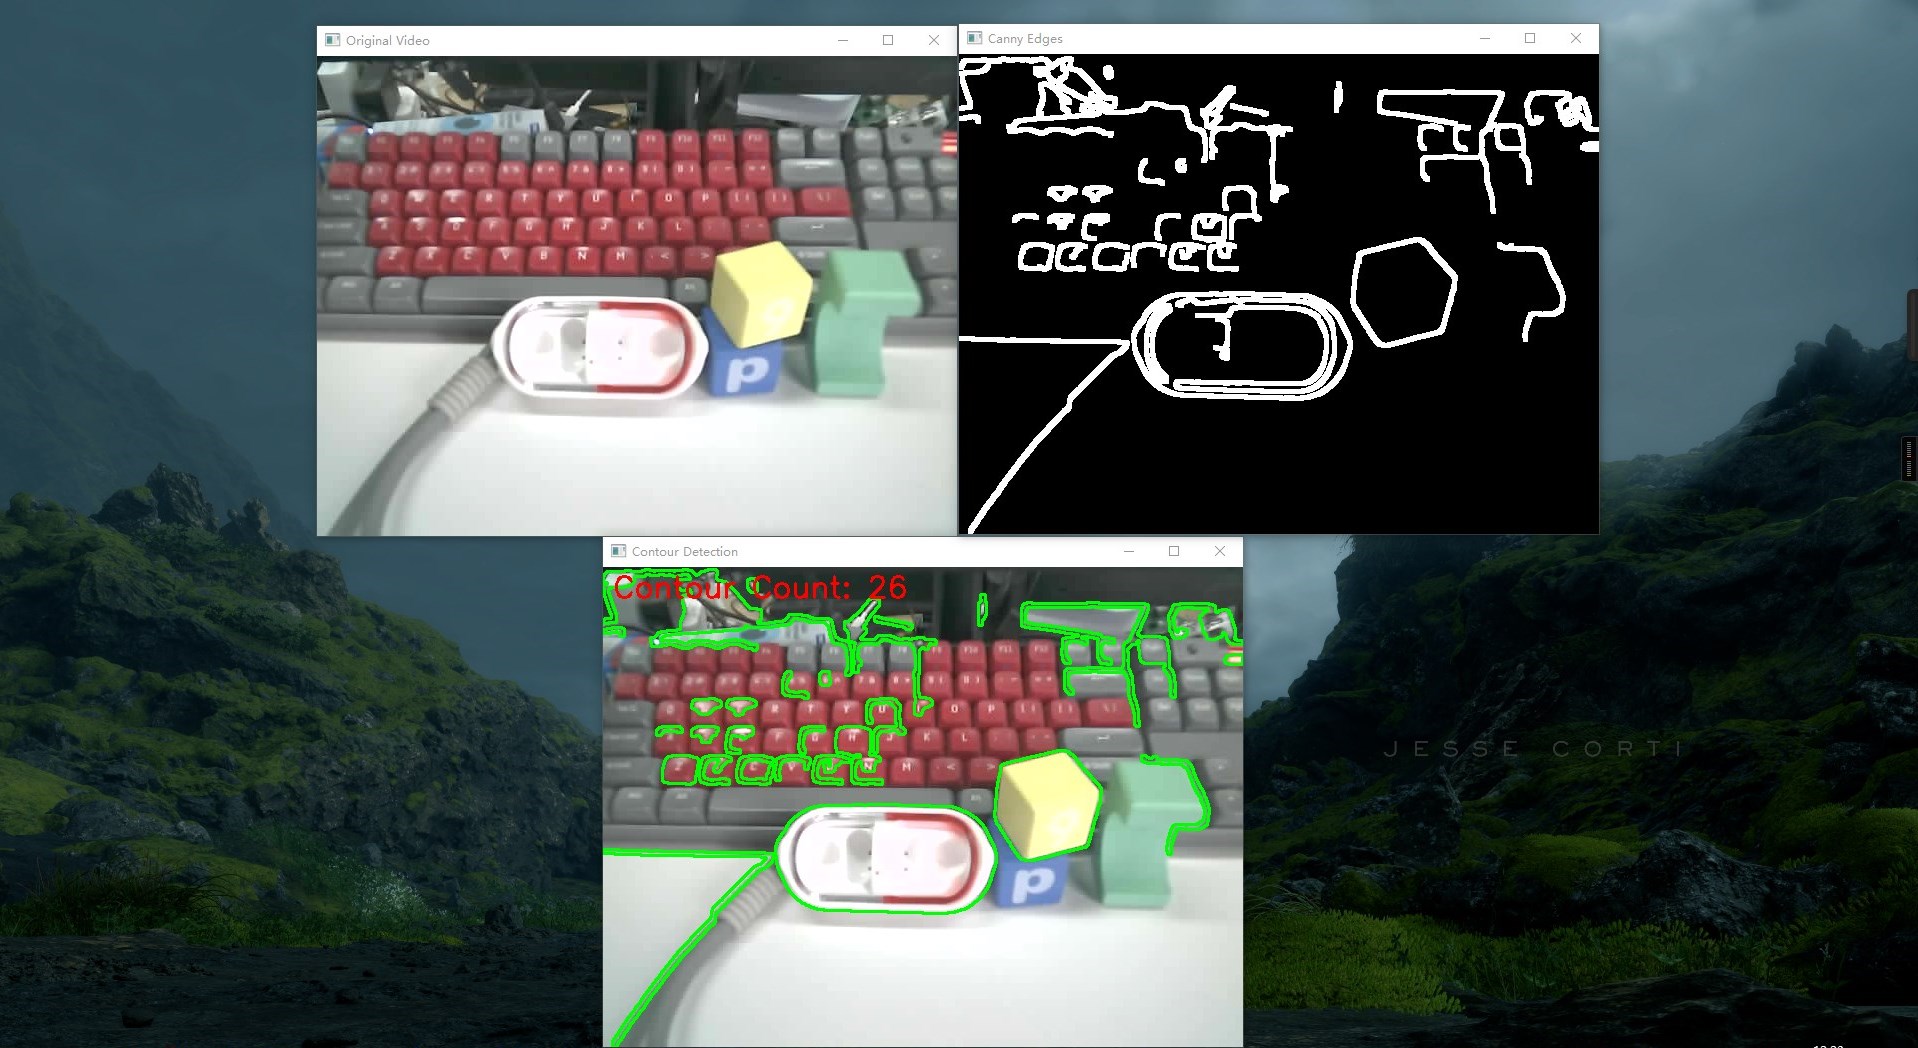
1. Contour Detection
Captures images from the UVC camera and uses OpenCV to detect object contours.
Steps:
Connect the camera to your computer and verify it works using the built-in Camera app.
Run the demo:
python openCV.pyYou will see the camera feed with green rectangular outlines drawn around detected object edges.
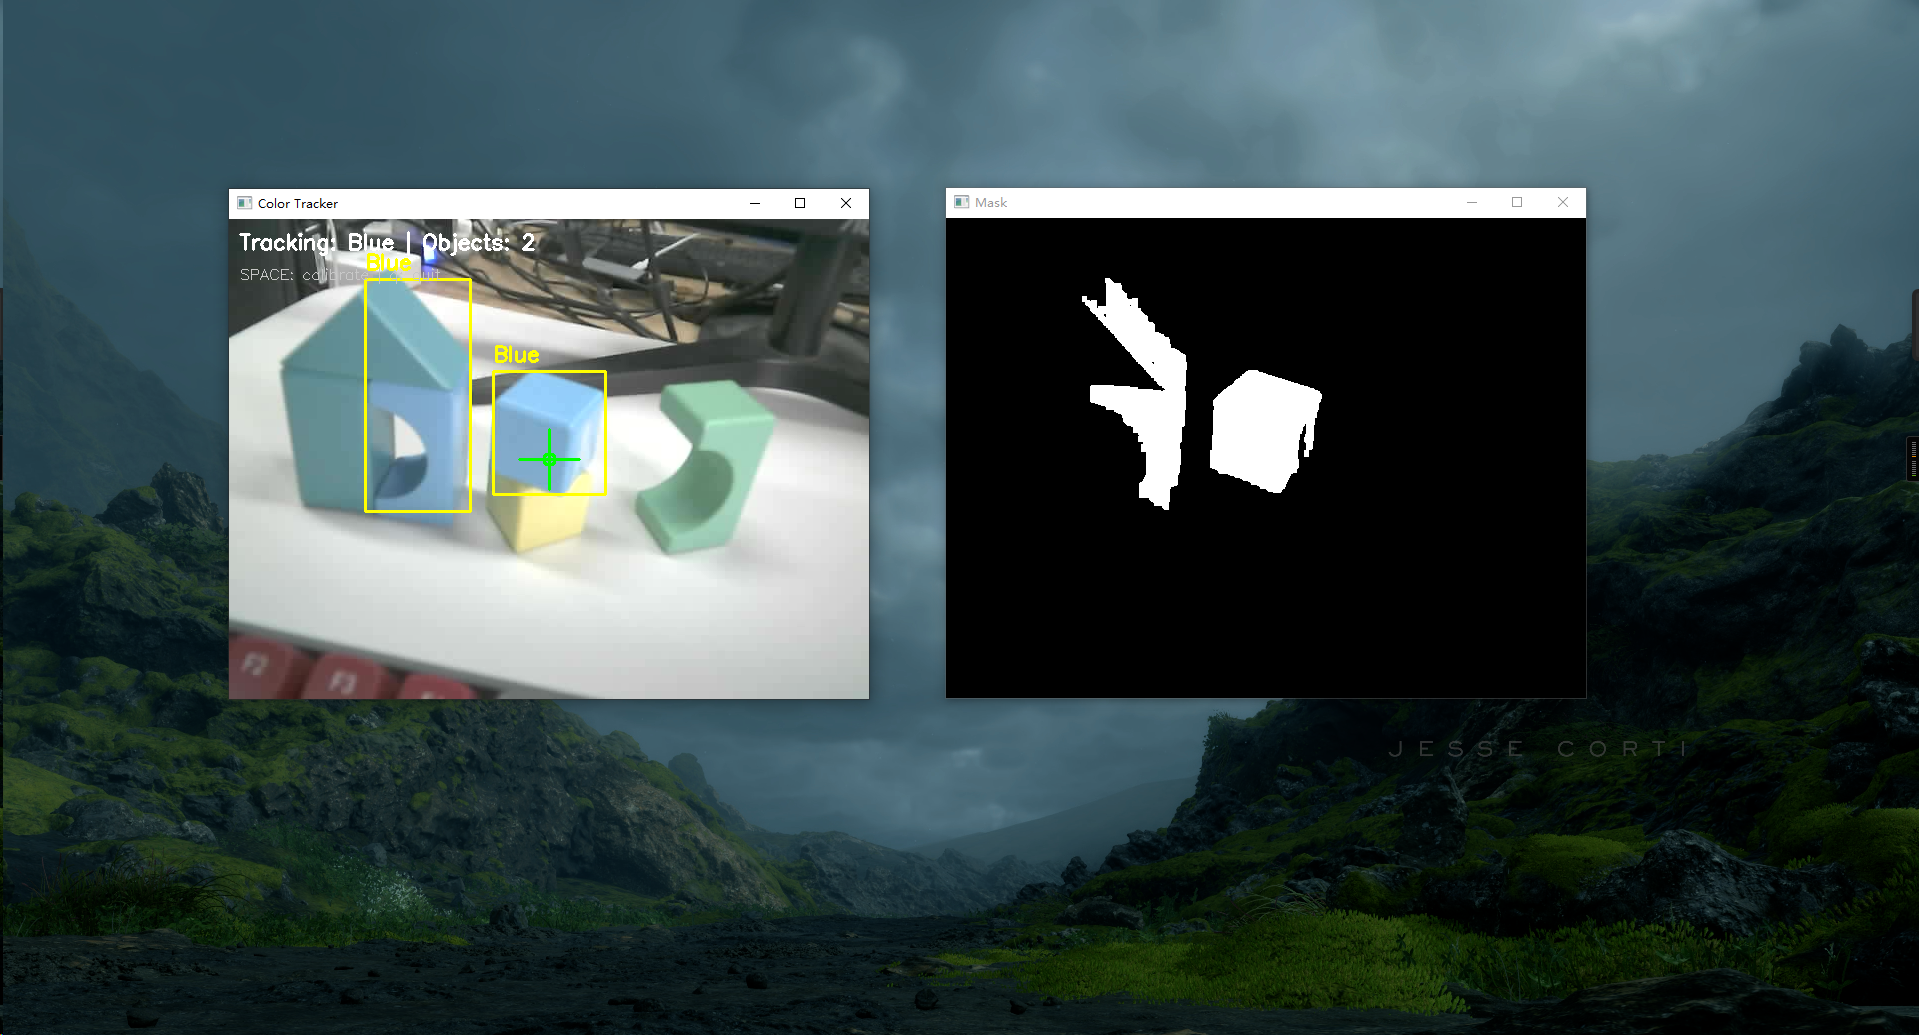
2. Color Tracking
Captures images from the UVC camera and uses OpenCV for color calibration and tracking.
Steps:
Connect the camera to your computer and verify it works using the built-in Camera app.
Run the demo:
python color_tracker.pyTwo windows will appear. The first window has a crosshair in the center. Aim it at the object whose color you want to track and press
Space. OpenCV will then track objects of that color and overlay the result in the first window.
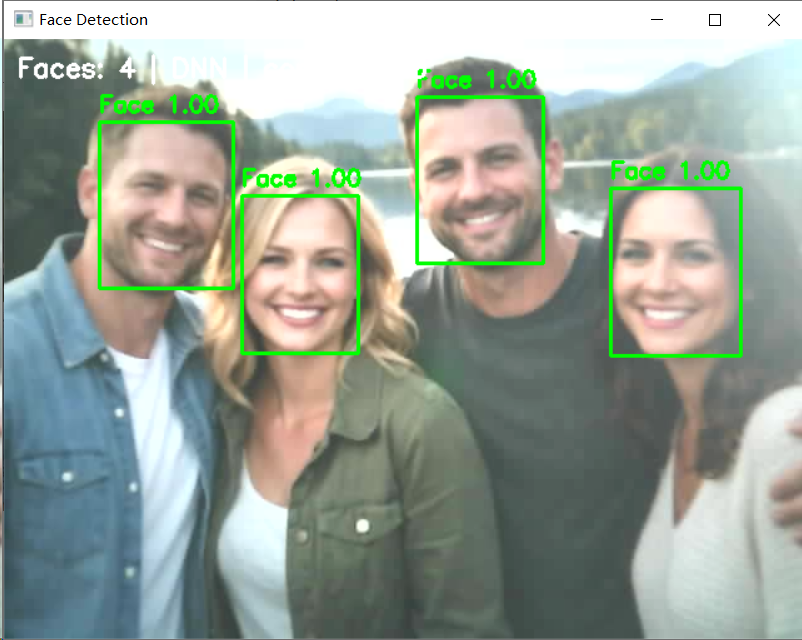
3. Face Detection
Captures images from the UVC camera and uses OpenCV for real-time face detection.
Steps:
Connect the camera to your computer and verify it works using the built-in Camera app.
Run the demo:
python face_detector.py --model models/res10_300x300_ssd_iter_140000.caffemodel --config models/deploy.prototxt --conf 0.6
A video window will appear showing detected faces.
Part 2: YOLO
Note
All YOLO projects require the UVC webcam firmware. Please flash the usb_webcam project from the ESP-IDF chapter to the development board first.
For each project below, open VS Code, navigate to the Advanced/2.yolo directory, right-click and select “Open in Integrated Terminal”.
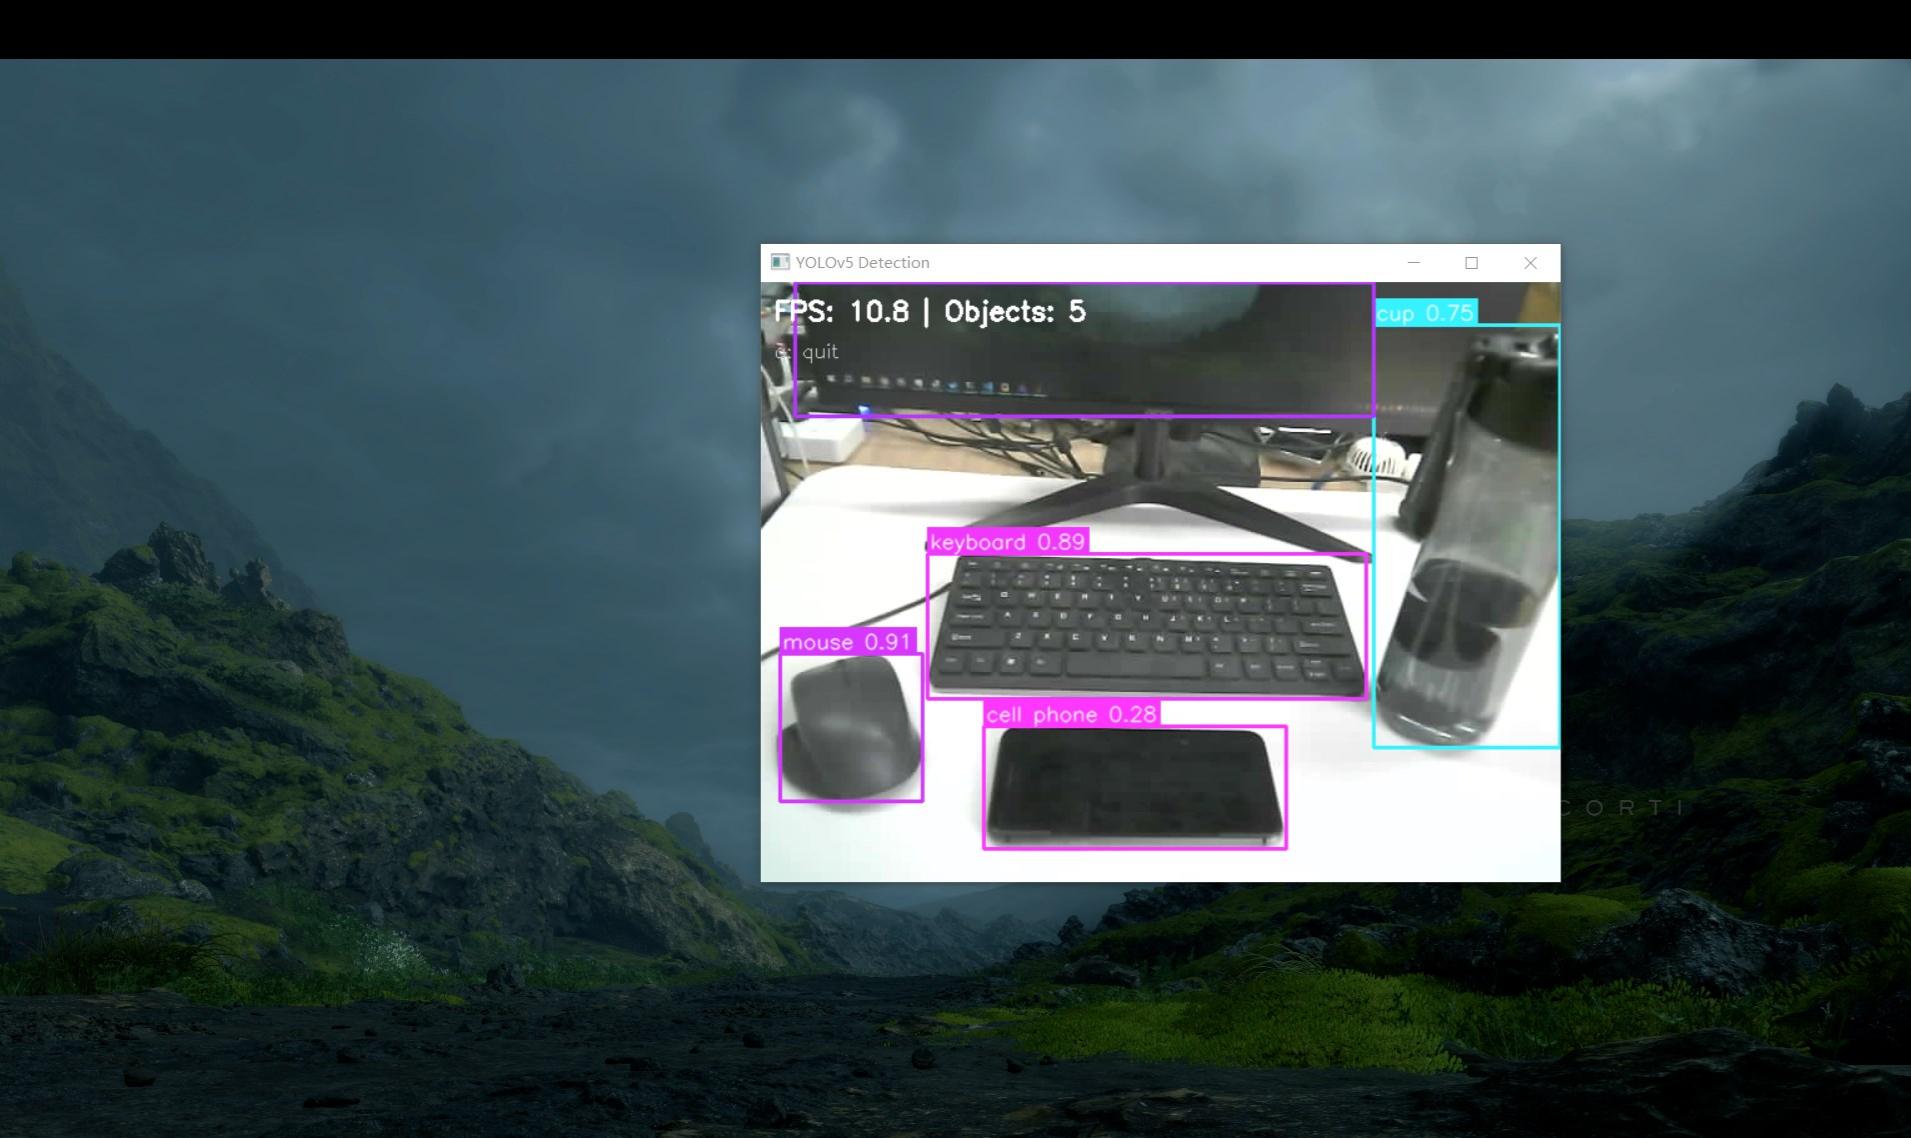
1. Object Recognition (YOLOv5su)
Uses YOLOv5su to perform real-time object detection and classification from the UVC camera feed.
Steps:
Connect the camera to your computer and verify it works using the built-in Camera app.
Run the demo:
python 1.yolo_object_recognition.py
A video stream window will appear. Point the camera at objects and YOLOv5su will identify and classify them in real time.
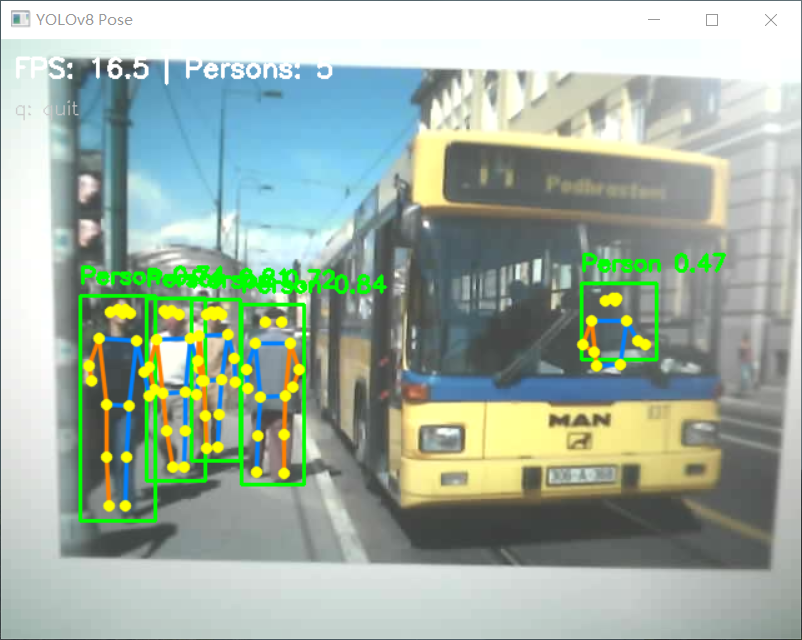
2. Pose Estimation (YOLOv8n-pose)
Uses YOLOv8n-pose to perform real-time human body pose estimation from the UVC camera feed.
Steps:
Connect the camera to your computer and verify it works using the built-in Camera app.
Run the demo:
python 2.yolo_pose.py
A video stream window will appear. Point the camera at a person and the model will detect and display body joint keypoints in real time.